iPhone Jailbreak & Unlock instructions for iPhoneOS version 3.1.3
I’ve performed a total of 4 jailbreak & unlocks on my 1st and 2nd generation iPhones and every time I’ve had to re-learn how to do it because enough time passes and the procedure changes enough such that I feel like I’m doing it for the first time. Now I’m sure that by the time I hit save on this blog entry it will be out dated, but at least I’ll have a reference point for the next time I decide I want a newer firmware on my favorite mobile device. Hopefully, it will prove useful for someone else in the mean time as well.
Before I get into this, lets first explain what the terms “jailbreak” and “unlock” mean as they pertain to iPhones.
Jailbreak: Jailbreaking your iPhone means that you are modifying the firmware that runs on the phone to allow non-Apple 3rd party software to be installed on it. Why would you want to do this? Well in most cases people want to jailbreak their iPhones because it is the necessary prerequisite to unlocking an iPhone. Other reasons include being able to install non-Appstore apps. For example apps that provided features such as Tethering and Video Camera support were all available for the iPhone well before they were officially supported.
Unlock: Unlocking a phone is a very common process for any phone (iPhone or not) that runs on a GSM network. In the US (and other countries) cell phone providers team up with cell phone manufacturers and they tie down the phone to only work with the cell phone service that the phone was sold with. There is no technological reason for why this must be true, it is strictly a business decision. Unlocking a GSM phone allows someone who owns a phone that works on one GSM network to work on any GSM network. This was especially useful when the iPhone was first released because it was initially only available in the US. Folks in other countries were eager to also get their hands on an iPhone but didn’t want to wait for all the red tape necessary for their local cell phone providers in their countries to make them available. All they needed was an iPhone and the ability to jailbreak and unlock the phone and they could be up and running on any existing GSM network. For people living in the US who wanted an iPhone but did not want to be locked down with unreasonable AT&T contracts and rates would jailbreak & unlock their iPhones so that they could use them on T-Mobile’s GSM network. Currently in the US there are only two cell phone providers with GSM networks: AT&T and T-Mobile. Verizon, Sprint, MetroPCS, Virgin Mobile are not GSM networks so even if you jailbreak and unlock your iPhone you will not be able to use it with those networks.
All the jailbreaks & unlocks that I’ve used have been free. It just seems so wrong to pay for something that is available for free. Please do not pay someone to jailbreak your iPhone. They are ripping you off if they charge you anything > $0.00.
This blog entry contains the steps I used to recently jailbreak my 1st Generation iPhone (will work with 3G & 3Gs as well) with the 3.1.3 Firmware.
Before we start, I think it’s important to understand from a high level what Jailbreaking and Unlocking your iPhone entails. There are many ways of doing it and many applications available. The method that I am describing here involves using a tool that only runs on MacOS X which is called PwangeTool.
The high level steps are:
1. Download PwangeTool, Bootloader and the 3.1.3 iPhoneOS Firmware files.
2. Run PwangeTool to create a custom Firmware file which contains the necessary jailbreak and unlock features.
3. Use iTunes to perform a “Restore” of your iPhone using the custom firmware file you created using PwnageTool.
Detailed instructions on iPhone Jailbreak & Unlock for iPhoneOS version 3.1.3
Step 1: Create a jailbreak folder on your Mac
I have a folder called “iPhone” and then a subfolder called “jailbreak” and within that I have yet another subfolder for the iPhoneOS version that I am doing a jailbreak for. In this case the folder is named “313”. In the next 3 steps you will be downloading 3 different files. Save them all to your “iPhone/jailbreak/313” folder.
Step 2: Download PwnageTool 3.1.5 for MacOS X.
It will download as a MacOS dmg file. Open the dmg file in Finder and then copy the PwnageTool app to your “iPhone/jailbreak/313” folder.
Official Bittorrent Releases
PwnageTool 3.15 Torrent – PwnageTool_3.1.5.dmg.5344262.TPB.torrent
SHA1 Sum = 16611fb60d088edd2fa5128e4f95f35d8e56a603
Unofficial Links (Direct Links)
http://www.hackthatphone.net/PwnageTool_3.1.5.dmg
http://www.ipodtouchmasterfr.com/files/PwnageTool_3.1.5.dmg
http://apfelportal.de/host/images/PwnageTool_3.1.5.dmg
http://zombisoft.com/tools/PwnageTool_3.1.5.dmg
http://www.accesoriigsm.net/PwnageTool_3.1.5.dmg
http://files.bestblog.de/iphone/PwnageTool_3.1.5.dmg
Step 3: Download iPhone Bootloader 4.6.
This binary file is used by PwnageTool to perform the actual jailbreak. You can obtain this here:
http://www.iphone-hacks.com/iphone-downloads/file/132
Save it to your “iPhone/jailbreak/313” folder.
Step 4: Download iPhone 3.1.3 Firmware.
You have to start with an actual iPhoneOS Firmware file that PwnageTool will modify to jailbreak your iPhone. You can download the firmware from here:
http://www.felixbruns.de/iPod/firmware/
Save it to your “iPhone/jailbreak/313” folder.
Step 5: Run PwnageTool
Now you are ready to create a custom iPhoneOS Firmware file.
5.1 Click “OK” to the Copyright message.
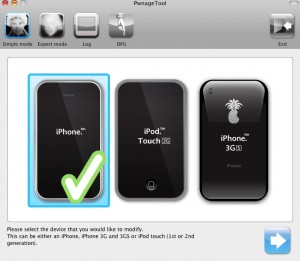
5.2 Select your iPhone type (1st Gen, iPod Touch or iPhone 3G, 3Gs). Click on the blue next arrow.
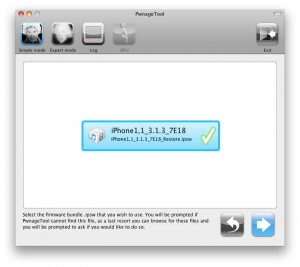
5.3 If you followed the previous steps correctly and placed the Firmware and Bootloader files in the same Folder as PwnageTool, then PwnageTool should detect the file and show you a screen like this. You can then select the Firmware file and click on the next blue arrow button.
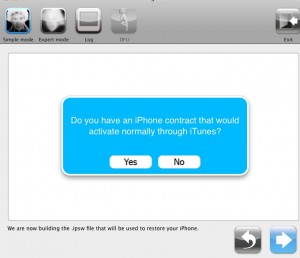
5.4 You will now be prompted by PwnageTool to continue with building the custom ipsw (Firmware file). Say yes to this. Then it will prompt you with the question: “Do you have an iPhone contract that would activate normally through iTunes?”. If you want to perform an Unlock, which will allow you to use your iPhone with a SIM card from any GSM cell phone service then you should say “Yes” to this question.
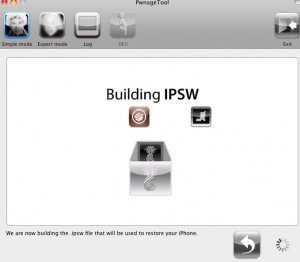
Step 5.5 Create the custom Firmware file. PwnageTool will display a window saying “Building IPSW” with some iPhone app icons falling into a box with a Pineapple. At some point you will be asked to type in your Keychain password. Go ahead and do that. Creating the Firmware file takes a few minutes so be patient.
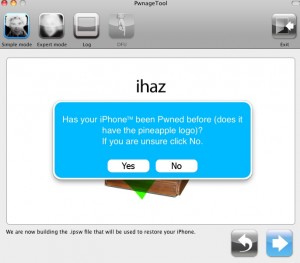
Step 5.6 After PwnageTool is done building the custom firmware file it will prompt you to ask if you have used PwangeTool before to jailbreak your iPhone. You will know if you have because whenever you boot your iPhone it will start with a pineapple bitten into as opposed to the Apple logo.
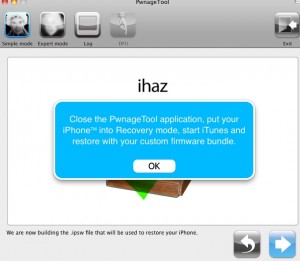
Step 5.7 Now you are done. PwnageTool will tell you to quit the application and run iTunes.
Step 6: Close PwnageTool and Run iTunes
6.1 Connect your iPhone to your Mac with the USB iPhone cable.
6.2 Select your iPhone in iTunes and then hit the ‘alt’ key while clicking on the “Restore” button. This will pop up a Finder like window dialog so that you can browse to a file. Go to your Desktop and select the custom firmware file that PwnageTool created. The file will be named something like: iPhone1,1_3.1.3_7E18_Custom_Restore.ipsw
6.3 Let iTunes do its thing and be patient as your iPhone is rebooted and gets the new firmware installed on it.
7. You’re done!
You now have an iPhone that has been jailbroken and unlocked! Congratulations
2 Comments
This is great, Fouzi. I’m definitely going to reference this when I become one with the Apple zombies next month. Viva La Jobs!
http://www.sfgate.com/cgi-bin/blogs/ybenjamin/detail?entry_id=68761
Getting more mainstream …